Friday, May 31, 2013

1/72 Zombies step-by-step Pt. 3: Zombies complete!


(Update: New camera, new photos!) Zombies are finally complete! Part 1 of this tutorial covered modding figures to make 1/72 zombies, part 2 covered actual painting, and this part will cover finishing touches, including the "magic dip" method for adding outlines and shadows.

IMPORTANT UPDATE (10/2013)!: After using this method on several miniatures, I've concluded that the solvent used in the Minwax dip is reactive to certain kinds of plastic, creating a sticky sheen that matte spray can't kill or contain. This includes the softer plastic used in Caesar Miniatures and Twilight Creations minis used here, plus the material used in Reaper Bones. The Italeri minis used for these zombies seems unaffected, as does the harder plastic used in Warhammer, Arcane Legions, Age of Mythology, and strangely, the soft plastic used by Hat.

I can't really recommend this method anymore. If you still want to use it, make sure it's on plastic that won't react by testing first, or find a way to seal the plastic before dipping (primer and paint isn't sufficient). I brushed on a coat of Pledge Floor Care Multisurface Finish (aka Future Shine) on all my affected minis, and it seems to have alleviated the problem significantly; it may also be enough of a seal to protect minis from The Dip.
1. The first step is to finish the bases. I just paint them with a couple coats of flat black paint. I don't like anything more detailed, preferring as neutral a base as I can so I can feasibly use these figures for a number of scenarios. If I added static grass, for example, they would look strange in an indoor dungeoncrawl.

2. The eponymous "dip" is this stuff: Minwax Polyshades, Classic Black Satin finish. It's wood stain and finish in one.  The figure is mounted here on a battery-powered drill: this is another reason I glue my minis to nails when painting. Some people prefer the control of painting the "dip" onto their figures, but as I find one needs to wipe the dip off no matter what, I like actually dunking the figures in the dip

3. I do this with a box nearby and plenty of paper towels on hand. I open the can, dip the mini while holding the drill, then immediately hold it over the box and spin the drill, to shake off most of the excess dip. Be sure to do this in a well-ventilated area, and to put the lid back on the can when you aren't using it to minimize exposure to fumes.

4. After it's dipped, you'll need to remove even more excess dip. Blowing on the mini while it's in the box will get rid of the globs that tend to accumulate between arms and legs, and a paper towel will soak any dip that pools in the neck and other places. Dab if you want to reduce the amount of dip, and wipe if you want to remove most of it. By the way, your minis usually won't turn out this dark: I have a problem with too-thick dip that I'll need to solve.

5. Give the dip at least a full day to dry (IMPORTANT UPDATE: I've since learned that 3 or 4 days at least is necessary for the dip to dry, or it will eventually turn sticky). Even with the satin finish instead of the gloss, the dip looks way too shiny for most minis. A matte spray will solve this problem, and will also provide another layer of protection. Do this outside on a fairly warm day with fairly low humidity, and be sure to rotate the figures and spray as much of them as you can.

6. Give the matte around an hour to dry: You'll see that it kills the shine and also gets rid of a lot of the blobbiness the dip leaves. At this point you can simply pry the minis off the nail head, and they're mostly ready to go (the nails are reusable). You may want to use a hobby knife or emory board to get rid of any excess glue or paint that accumulated around the nail head on the bottom of the miniature, so it will rest flat on the table.
I hope this tutorial was helpful to at least some of you. As I mentioned, I'm concerned by how dark and splotchy the dip is leaving my figures lately. It's a decent effect for zombies, but I used to get a much cleaner look from this method. I think the problem is that I was lazy about fully sealing the can of dip when I was done with it, which allowed for a degree of evaporation that has now left the dip too thick. I need to figure out a way to thin it with something that won't eat my plastic figures. I'd welcome any suggestions!

Sven's bad day, part 2.

Tuesday, May 28, 2013

1/72 Zombies step-by-step Pt. 2: Painting

Last time, we performed some simple head swaps to create the Unpainted Undead.


Now let's get them looking a little less unpainted and a little more undead. These are some pretty basic tips here, as my painting doesn't involve much fancy technique, but everyone needs to learn the basics some time.

1.) The first step is to wash the figures with a mix of dish detergent and water, scrubbing with an old toothbrush. This cleans off the mold release agent miniature makers use, which can keep paint from sticking.

2. Next, I superglued the minis to their base, here a 3/4" fender washer. Usually the base that's molded with the figure will cover the hole in the washer, so I don't usually bother with more complicated basing. I then glued the washer to a framing nail, so the mini can easily be handled or kept in a styrofoam block when not in use.

3. I then sprayed the miniatures outside with a white plastic primer. You need a fairly warm, fairly low-humidity day to do this, or the primer won't stick or dry correctly. I make sure to rotate the figures so I cover as much as I can. I'm not totally sold on Krylon as a primer, but it provides a bright, fairly even palette that along with washing the minis will ensure the paint sticks.

4. One impulsive modification I made was to hack at the zombie bodies with a hobby knife, so they looked a little less like the healthy barbarians they originally were and more like the decomposing undead monsters they are. I painted these areas first. If I was smart, I would have also painted the teeth and eyes at the time.

5. Instead, I started painting the fleshtones, here a livid blue. It's a little bolder than what's probably realistic (for the walking dead, that is), but I like my hordes to have a distinct, consistent color scheme, and I hadn't painted a blue army yet. You can see that since the wounds are a layer beneath the zombie skin, it makes it easier to paint the skin over and around the wounds than the other way around. This is also why it would have worked better to paint the eyes and teeth first.

6. Here are the eyes and teeth painted in. I typically need at least two coats of paint to cover, so it wasn't that big a deal to repaint the flesh around the eyes and teeth once they were colored. I usually don't bother painting facial details, but the mouths on these minis are very obvious, and I thought the yellow eyes would give some zing to what would otherwise be a very unlively (heh) color scheme.

7. And here's our undead friend with all the color on him. I could have showed more steps, but I basically just blockpainted the zombie's clothes, with a little bit of drybrushing (painting raised areas with a brush with most of the paint wiped off) to bring out the details on the scabbard. Most of the paint I use is Delta Ceramcoat, a craft paint sold in stores like Hobby Lobby, along with some even cheaper brands. If I used tricks like outlining or wet-blending, I'd probably use paint specifically blended for miniature painting, but the cheaper paints are just fine for my purposes.
As far as I'm concerned, the zombies are painted, but not complete. The final steps will take the figures away from their current flat, plastic look into something with a little more definition and detail. Hopefully these will be done by the end of the week (update: zombies are complete!); otherwise they'll be delayed just a bit. Either way, I'm please with how my zombies are looking so far.

Wednesday, May 15, 2013

World of Warcraft board game minis

Update: The Miniature Market sale is over, but I have a few of these minis for sale on eBay.

Miniature Market is offering its annual Spring Cleaning sale through May 17th 2013, with an additional 20% off all clearance items. I noticed that one such item was the Burning Crusade expansion for the World of Warcraft board game from Fantasy Flight, which is a trove of dozens of great plastic fantasy minis. Unfortunately, they seem to have since sold out, but you can find the expansion elsewhere (Amazon affiliates, for example) for under $30, which is still a fantastic deal.

Anyway, the sale made me think of the WoW board game minis I already have. The figures are 28mm, but a lot of them work surprisingly well in 1/72 scale. There was a time where you could get a lot of figures for the original game on eBay, but that seems to be less commonplace now. Still, the Burning Crusade expansion has one of each of the minis from the original game in purple plastic, so they can still be had.

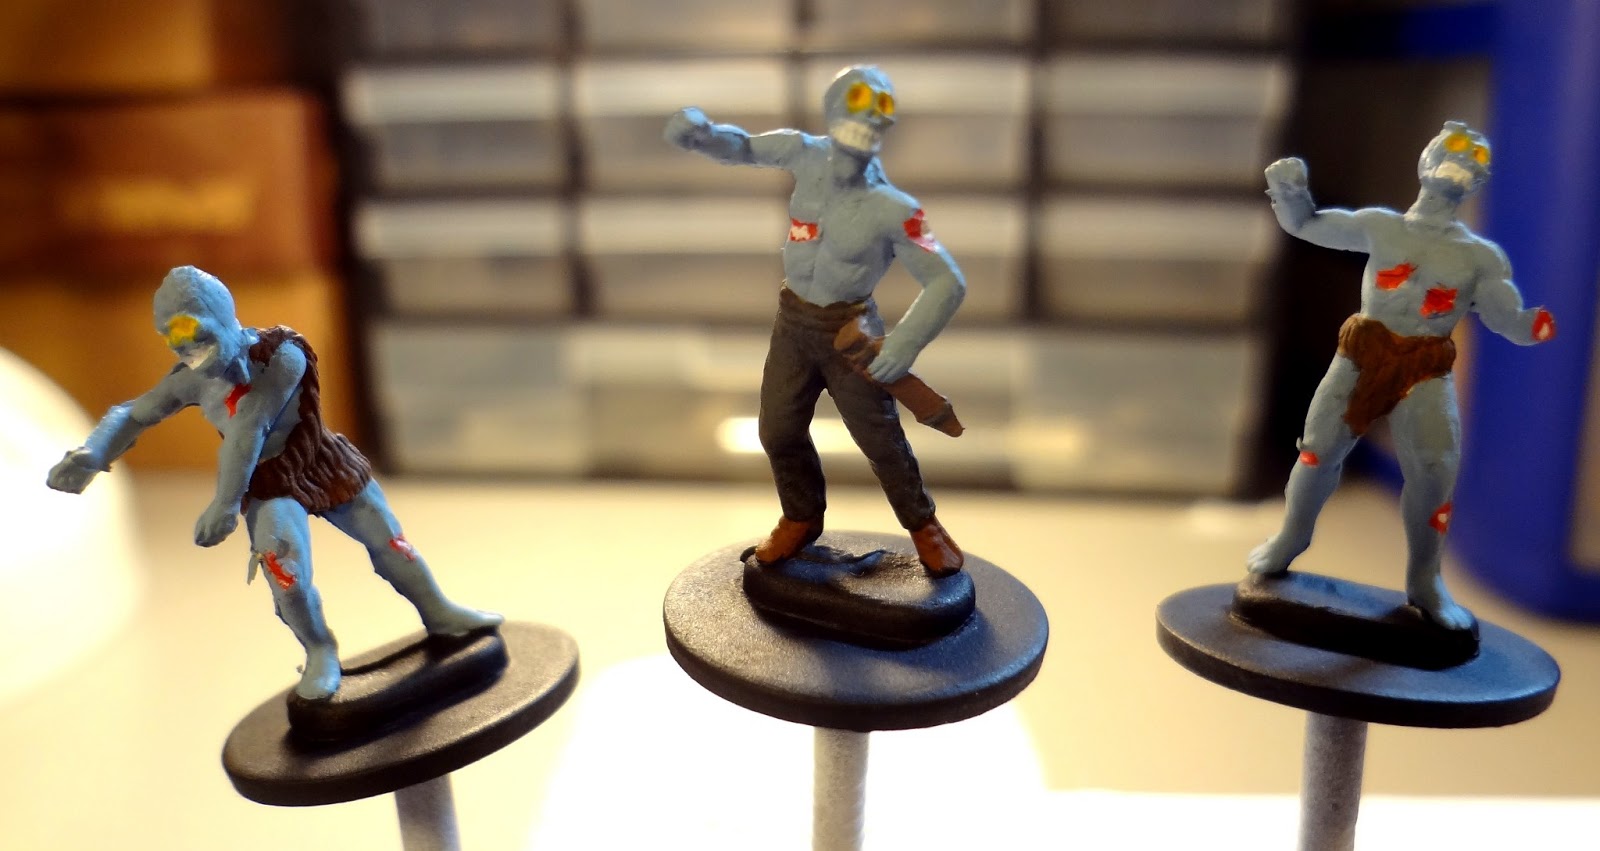
The first set of photos are figures from the original World of Warcraft game, but again, they can also be had in the expansion. First, a couple of gnolls, a ghoul, and a murloc. I wish I had got more murlocs when they were available, as they make great human-sized fish-monsters in 1/72. The gnolls are arguably a bit oversized (MageKnight gnolls are a better fit, apparently), but gnolls are supposed to be a bit on the tall side. I plan on doing weapon swaps with some Warhammer skaven bits, like I did with the blue gnoll.

An ogre, a large demon Wrath Guard, and a Wildkin. The latter will make a perfect owlbear once I trim the antlers.

An Infernal, which will make a fine earth elemental, and a Drake, which is WoW-speak for dragon, I suppose. I like the poses on these: the Infernal gives the sense of how a giant rock monster would stomp toward you, and the Drake looks like it's regarding a smaller foe in irritation.
Or perhaps like it has just spilled mustard on its favorite shirt. "Dang, I just had this dry-cleaned!"

This next set of photos are of minis that are only in the Burning Crusade set. Here's a Yeti and a Fungal Giant, which is suitable for many sorts of giant monstrous creatures, fungal or otherwise.

Last, a Ravager, a giant undead Abomination, and an Ooze. The Ravager makes a nice generically Lovecraftian or demonic monster. I may want to modify the ooze so it doesn't have a face or arrows coming out of it, but as most ooze minis are pretty expensive, considering they're just amorphous lumps, I was glad to find it.

These are just some of my favorite minis from the World of Warcraft Burning Crusade expansion. It literally has several pounds of plastic minis, and if you can find it at the right price, it's well worth obtaining, even if you never play the game.

Friday, May 10, 2013

Skeletons!

I promised an undead horde of some sort or another. Zombies will come later, but I started painting these guys and wanted to finish them. They're Caesar Miniatures undead figures, with just a few simple mods.

They're a little grimier than I would have liked. I use a battery-powered drill to shake off the excess dip I use for shading, and when it's not fully charged, it doesn't quite do the job. Still, they're supposed to be mouldering skeletal guardians of the ancient sort, so I shouldn't complain.

Other than that, they were pretty fun and easy to paint. Since they're mostly old bones, it was just a matter of spreading enough dull yellow paint around most of the minis, then taking care of the little details.

Sven's bad day, part one.